
.
12,000 plans and woodworking patterns for sheds
.
Every conceivable style of shed that you can imagine
.
Includes hundreds of other plans of ideas that you can build
.
Click Here! now to check them out
.

.
Check out the 14,000 woodworking plans here
.
Every plan has step by step instructions with pics making it very easy
.
You can be a pro with these plans
.
Click Here! to check them out now
.

.
Build your own chicken coup
.
You can with these easy step by step guides
.
Get started now and you will soon have fresh eggs every day
.
Click Here! to get your chicken coup building guides now
.

.
Ted's Woodworking has 16,000 plans for you
.
Heaps of ideas here for you to build including sheds and video instructions
.
Click Here! to check out Ted's woodworking plans now
.

.
Are you into fishing and woodworking
.
Why not build your own boat
.
254 complete boat plans here for you
.
Every style and size you could want
.
Click Here! to start building your boat now
.
.Plans4Boats contains highly detailed ebooks with great photographs. The author is a professional boat-builder who, like the magician that reveals his tricks, describes everything - down to proper material selection, plans and numerous other details. "I think Plans4Boats DVD is the best investment I've made in a long time. I have started calculating how much I could actually save if I'd bought this before I started on my 12 Foot Rowboat." ... I've just downloaded your fabulous collection of woodworking plans. The thing that really gets me is that quality of
these plans is nothing but amazing.
I've never had such a pleasant experience with an on-line purchase. I'll be recommending your website to all my fellow friends.
Thanks for all the amazing advice you gave me!
I bought my own materials as listed and spent $751 lesser than what I would expect to pay from a ready-made 12x16 shed."
2. Saves Money – you save money when you don’t have to spend $thousands$ on a "retail chicken coop"
3. GO GREEN – Do your part to stop the mishandling of chickens in commercial battery cages!
4. Produce your own Eggs – No eggs taste better (or are healthier) then fresh eggs from your backyard.
5. It’s Fun – just wait until your friends and family see what you have created!
Of all the woodworking kits I have bought over the years, this is the best collection I have. In saying this, I think it's an excellent woodworking book and DVD for beginners as well as seasoned woodworkers.
It includes tons of plans (over 16,000!) for different furniture plans and outdoor woodwork projects. Although I don't plan on making any of these, it gives a great insight into how to build different things with woodworking patterns.
It is simply outstanding and an excellent investment for anyone starting out. I would loved to have had these plans when I was building my first outdoor deck.
Considering the excellent content, the quality of the plans itself, and the bonus software, this package is quite a bargain.
Here's the BIG problem: Most plans and woodworking magazines are complete garbage.
The dream of building or owning
" 254 Boat Plans with step-by-step instructions,
I contacted my friend Jim, and we decided that with his poultry background and my engineerng background that we could design a chicken coop plan for the everyday average person.
Here's the BIG problem: Most plans and woodworking magazines are complete garbage.
Why? They skip over many important parts, their diagrams are confusing, unclear, or even wrong and they often skip important parts. No wonder woodworking seemed so hard!
The truth is, I have spent a ton of time looking online and reading magazines. Most of them just left me with more questions than answers.
The Faster & Easier Way To Woodworking!
The truth is, I have spent a ton of time looking online and reading magazines. Most of them just left me with more questions than answers.
The Faster & Easier Way To Woodworking!
Well, luckily for you, these problems become a blessing in disguise because I have spent the last 2 years to put together a comprehensive woodworking package with a clear, detailed, step-by-step system that didn't leave anything to the imagination.
The dream of building or owning
your own boat can now be a reality... "
If you're anything like me, you just can't stomach the thought of spending thousands of dollars on a factory made boat. Well, I have good news for you, YOU DON'T HAVE TO!
I've got simple, easy-to-follow plans that will allow anyone from any walk of life to build their very own boat, and for a fraction of the cost of buying one. With minimal supplies, and a very small cost, you'll get your boat on the water in no time!
Using clearly written and illustrated step-by-step instructions, my plans explain the basics of boat construction, tools, materials, shop safety, and more, as I help you choose and build the simple boat of your dreams. Plans4Boats is a big, comprehensive package that contains all the plans, measurements, and directions needed to build beautiful small boats for oar, sail, or motor.
Boatbuilding is a tirelessly evolving craft, with new techniques and materials constantly being developed.
My Plans4Boats Package is for all those interested in the satisfying challenge of designing and building boats with marine plywood (as well as a variety of other materials).
With an eye to economy and ease, I have modernized the boatbuilding process just enough to allow even the unskilled (and underfunded) to succeed. The process is quicker, easier, uses fewer parts, and produces a boat that is much easier to maintain.
" 254 Boat Plans with step-by-step instructions,
and diagrams to make every project laughably easy..."
Can You Build Your Own Chicken Coop?
I had no idea that thousands of people were building chicken coops in their backyard. But where were they getting their plans? I collected various drawings and ‘do it yourself ideas’ but nothing was very organized. I purchased a few guides, but all were either incomplete or you needed to be a carpenter to understand the steps. Even with my engineering background these plans all left gaps that were tough to fill.I contacted my friend Jim, and we decided that with his poultry background and my engineerng background that we could design a chicken coop plan for the everyday average person.
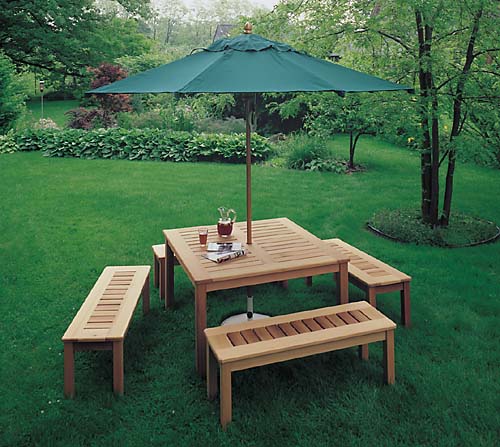
Some Samples Of Shed Plans Available | ||
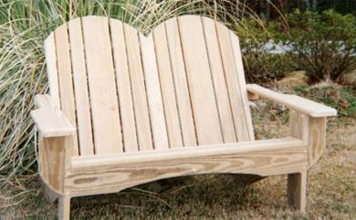
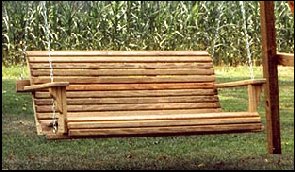
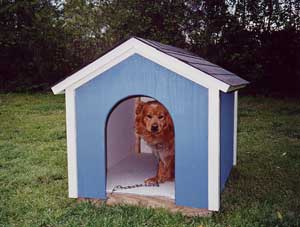
A Guide to Building - Outdoor Stairs A pergola Adirondack Chair 1 Adirondack Chair 2 Adirondack Chair 3 Adirondack Chair 4 Adirondack Chair 5 Adirondack Chair 6 Adirondack Chair 7 Aldo Leopold Bench Basic Dog house Arched bridge Backyard Arbor 1 Backyard Arbor 2 Backyard BBQ Pit Backyard Ferris Wheel Backyard Lighthouse Backyard Steps Backyard Train Barbecue Trolley Basic Gazebo Bathing Beautie Shed BBQ Caddie BBQ Cart Beach Chair Bench and Planter Box Bench Outdoor Feed Cart Decking & Fences | Dog Kennel 1 Dog Kennel 2 Dog Kennel 3 Dog Kennel 4 Dog Kennel Doghouse Plans Doghouse, Basic Dust Bin Shed Elegant Picnic Table Farm tableAdirondack rocking chair Fence Installation Fence Window Fence Flower Box Foundation information Garden Arbour & Sun Shade Garden Bench 1 Garden Bench 2 Garden Bridge Garden Centre Trolley Garden Chair and Ottoman Garden Gate Garden Planter Square Garden Shed Project Plan Garden Swing Garden Swing1 Garden wheelbarrow Garden Windmill Glider Swing(1) | Picnic Table 1 Picnic Table 2 Sonoma 2 Picnic Table Plant Stand Planter - petulmar Planter - picket fence Planter Bench 1 Planter Box 1 Planter Box with Lattice Playground Equipment Plywood Trestle table Plywood Window Box Porch Swing 1 Post & Rail Fence Railing Planter Routed Address Sign Sand BoxSee Saw Shed 12x8 plans Shed 6 x 8 plan2 Shed 6 x 8 plans Shed buying guide Shed Foundations Shed framing Shed Instructions Single Garage Plans Small Chicken House Small Trolley Spa Surround |
Bench Seat Blanket chest 2 Bridge Superstructures Build a Footbridge Build a Tree Bench Building A Shed Base Bungalow Mailbox Camp Stoves Carport Instructions Carport Cavendish BBQ Table Cedar Privacy Screen Chair Swing Storage Shed 9 | Glider Swing(2) Hexagonal BBQ Table How to Build a Fence Walk Through Garden Pergola How to make a Wendy house Ideas for landscape Lake Tahoe Gazebo Lattice Screen Plant Support Lawn Swing Lounge Chair Making an Easy Arbor Mendocino Bench 2 Mendocino Bench | Square Planter Box Steps in Building a Shed Storage Shed 1 Storage Shed 2 Storage Shed 3 Storage Shed 4 Storage Shed 5 Storage Shed 6 Storage Shed 7 Storage Shed 8 Outdoor Shed Garden Shed Garden Shed 2 |
Classic Cedar Garden Bench Classic Picket Fence Cold Frame 1 Cold Frame 2 Cold Frame 3 Commando Composter composting Covered BBQ Pit 1 Covered BBQ Pit 2 Cubbyhouse Deacons Bench Dog House | Monterey Potting Center 2 Monterey Potting Center Nursery Wagon Outdoor Fireplaces Outdoor Playhouseoutside stairs Patio Bench, concrete and plank Patio Chair and Love Seat Patio Chair Patio Planter Patio Recliner Patio Table & chairs Picket Flower Box Picnic table - Sonoma Picnic Table 1 | Storage Shed for Pesticides Swing Set The Putter Shed Timber Garden Shed - Part I Timber Garden Shed - Part II Trash Can Firewood storage unit Trash Can Corral Tree Caliper Wheelbarrow Planter Windsor Shade Shelter Wishing Well 1 Wooden Letter Box |
 |  |  |
Other Garages, Sheds, and Outbuildings | ||
24' x 64' Utility Building 10x12 shed plans gable roof 12x16 shed plans 30-frame-utility-building 30-pole-utility-building 32-step-puzzle-box 36-frame-utility-building 36-pole-utility-building 40-frame-utility-building 42-wide-pole-utility-building 50-pole-utility-building Farm Shop 24x30x10 Garage 20x20x8 Garage 12x20x8 Storage Celler 14x20x9 Garage 12x20 Garage 18x24 Garage 18x20Shop 18x46x8 Storage 24x36x10 Storage 26x70x8 Storage 36x60x19 Storage 20x27x115 Log Cabin 3 RM Log Cabin Feeding Barn 30x56 Mule Barn 2 storey Braced Rafter Barn Storage archroof Storage Shop 24x30 Pole Barn 39x60 Pole Barn 39x60 Pole Barn 39x60 Multi Purpose Pole Barn Walls Doors and Windows | Boat Landing Adirondack Shelter 1 BR Pole Frame Cabin 1 BR A Frame Cabin 16x20 Cabin 22x24 Dorm Loft Cabin Storage 28x74 Storage 12x16 Storage 10x12x12 Storage 12x12x8 Storage 8x8x8 Pesticide Shed 12x16 Storage 42x98x14 Storage 25x72x11 General Barn 18x30 General Barn 24x30 Lawn Tool Storage Cabinet 4x7x1 Storage 8x8x7 Storage 32x130x18 Carport 20x134 Carport 20x34 Pavilion with Storage 24x63 30x12 Storage 32x92x32 Storage Large Garage Driveway Planning Guides A-frame-cabin A-frame-cabin-2 Bulk-feed-storage fertilizer-storage-building Campground Stationcamp House Cattle-Shed-Clubhouse Comfort Station | General barnguest Storage 40x104x14 Storage 48x96x14 Storage 60x136x14 Storage 30x112x14 Storage 56x8848' Solar Machine Shop Farmshop and aptmt 50x75 Storage shed 6x8x7 Farm repair shop 32x64 Farm Shop Layouts 72x100 Storage Shed 8x12x6 Farmshop 28x50 Machinery Storage 3x98 Storage Shed General Purpose Pole Barn 40x44 General Barn 36x48 General Barntownhouse 2-bedroomtownhouse 3-bedroomtownhouse 4-bedroom Storage 25x36 Storage 30x60 Garage 24x24 Garage 24x24 Post Frame community-building community-log-home cotton-storage-shed Elevated Sawdust Bin Utility Building 36x64x10 Utility Building 36x64x11 Utility Building50x64x10 truss_50 truss_60 |
 |  |  |
Dear woodworker,
Let me take a wild guess. You've spent hundreds of dollars or even more on your woodworking projects - it took you a LOT longer than you thought, or maybe you even called it quits because you kept getting your measurements wrong.
Or perhaps you've:
 | Postponed a project because you ran out of ideas? |
| | Thought you had every detail figured out, only to find that it still went wrong! |
| | Had sticker-shock because of the high prices DIY stores charges for their sheds, decks and self assembly garden buildings? |
When I built my first deck, almost 20 years ago, I thought I had it all figured out. 4 exhausting months later, I still wasn't done - I thought I had every detail measured out, only to find that I've got it all WRONG. So I decided to find a better way.
For the past 6 years, I've spent thousands of hours buying, reading and restructuring woodworking plans. Restructuring, because most plans on the market left me with questions - not answers! Their diagrams are confusing, unclear, or even wrong and they often skip important parts. No wonder woodworking seemed so hard!
Yet all these issues were a blessing in disguise, because it made me create my own woodworking plans gallery: I named it "Woodworking4Home" - a clear, detailed, step-by-step system that didn't leave anything to the imagination.
14,000 Woodworking Plans with step-by-step instructions,
photos and diagrams to make every project laughably easy..


 The charms link together using a loop on the back of the starter bracelet which hooks up to the opening on the charm. Notice that in order to put the new charm on you must expand the starter link outward and press down with your thumb to keep it in place. If it is your first time you may find it easier to use a tool of some type, a nail file or strong object to hold open the link while putting on the charm, another set of hands is sometimes helpful as well.
  Holding the link open by using pressure from your thumb, slide the charm onto the end from the bottom up. Tilting it at an angle may help to align the links to make it easier to slide onto the starter.
  Hold the bracelet securely: Using the left hand, hold the bracelet in the palm of your hand. Your index finger and thumb should be free.
 Secure the other side of the bracelet using your right hand, pull the bracelet outward to expand the links
  Both hands should be horizontal when pulling outward.
  Using your left hand press down into the charm area to keep bracelet expanded. If you are making a first time starter bracelet, you will need to use the last link on the right side of the bracelet as a starting point.
 Notice that the back of each link has a loop on which to put the charms, and that you can hook them on or off at that area.